Like all discoveries, it began with a problem
Flowduino
Before we begin…
This tutorial is broken up into multiple parts. I promise you, this isn’t about “getting clicks” or increasing traffic in any way. It is simply because the concepts discussed in these articles are complex, and shoving all of that information together into a single article would make it entirely indigestible.
To ensure a complete understanding, it is recommended that you read through each part in order.
Additionally, this article is written with the intention of being understandable not only by those with prior experience, but also by complete beginners to the subject. With that in mind, please be patient if you find yourself thinking “I already know this,” on multiple occasions.
Now, with all of that out of the way, let us begin…
A (short, I promise) ode to the ESP32…
The ESP32 is, without a doubt, one of the most “feature-complete” MCUs on the market.
Sporting a dual-core, 32bit, 160/240MHz CPU, an Ultra-Low Power (ULP) Coprocessor, persistent memory, integrated WiFi, Bluetooth, Bluetooth Low Energy (BLE) and a plethora of other – extremely useful – features, you will be hard-pressed to find a task for which it is not capable.
Indeed, it is precisely because of this wealth-spring of features on such a tiny package that I chose the ESP32-WROOM-32 MCU for a commercial-grade product presently in real-world testing.
The ESP32 is, I think it’s fair to say, not only a Jack-of-all-trades, but also a master of many. No surprise that this MCU is loved by an impressive consumer-base.
Let’s dive in!
The Mission…
An undefined number of ESP32-embedded devices must be able to automatically discover each-other, pair, and begin exchanging data… without any of them having any hard-coded MAC addresses for the others.
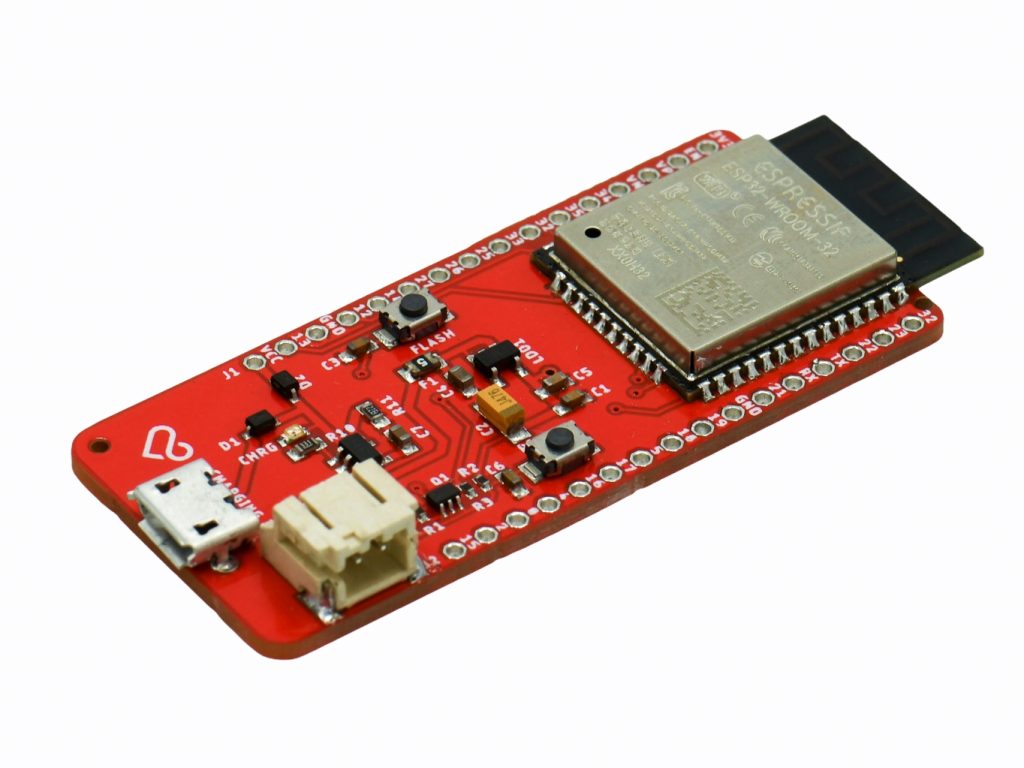
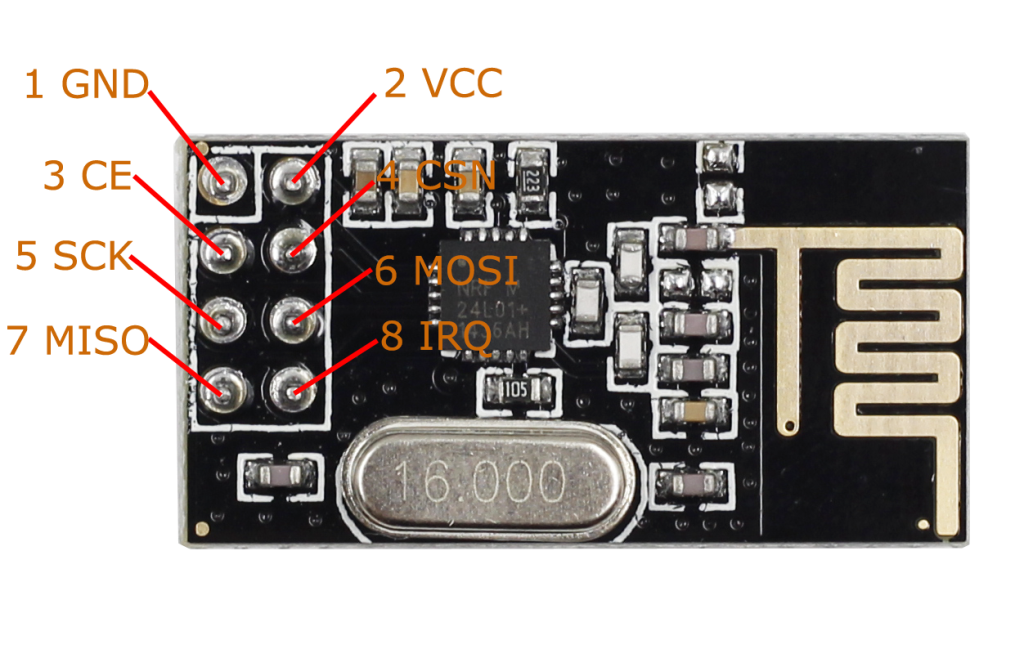
With Arduino modules, this would mean taking a radio module (such as the nRF24L01, or the HC-12), hooking it up to the GPIO (consuming multiple pins) and writing our own code to perform discovery, handshake, pairing, and data exchange.
While using an external radio module isn’t necessarily a problem (especially if you have the pins to spare) it increases cost, complexity (particularly when it comes to PCB design and production), and potential for faults/bugs that can be (I speak from infuriating experience here) an absolute nightmare to identify, let alone resolve.
Fortunately for us, the ESP32 (unlike the Arduino) features all of the distinct radios we require to accomplish this mission; and without the need to add any additional hardware!
Let us begin with a brief introduction to ESP-Now.
ESP-Now – What is it?
ESP-Now is a point-to-point communications protocol, developed by Espressif (creators of the ESP32), which enables ESP32 devices to communicate with each other, directly, via 2.4GHz at high speed, without the need to connect to a WiFi network.
Like most wireless communication protocols, pairing is required prior to sending our all-important data between devices. Once pairing has been performed, the devices are free to communicate directly and securely (at least, so Espressif claim) with each other.
ESP-Now supports every possible combination of transmitter/receiver scenarios.
One-to-One
One-Way
One-To-One, One-Way is the most simplistic form of communication between two ESP32 devices. Data from the left-hand ESP32 is sent (transmitted) to the right-hand ESP32. The right-hand ESP32 acts as a receiver only, and cannot transmit data to the left-hand ESP32.
One-to-One
Two-Way
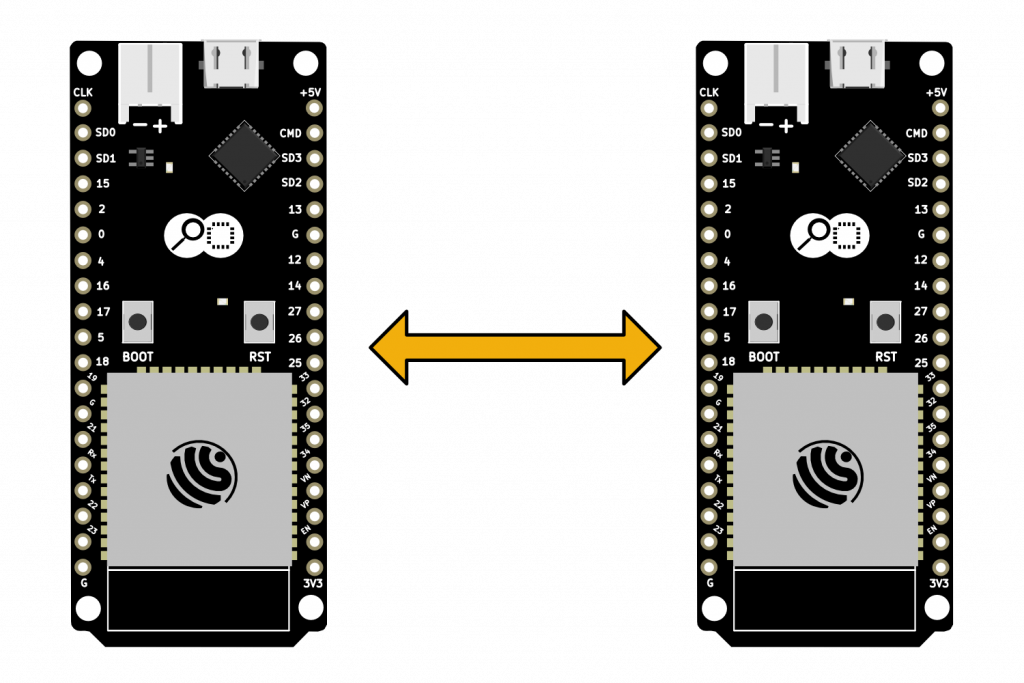
One-to-One, Two-Way is similarly simple to the previous scenario, except that both ESP32 devices act as transceivers; meaning that they can each send and receive data to and from (respectively) each other.
This is one of the more common scenarios.
One-to-Many
One-Way
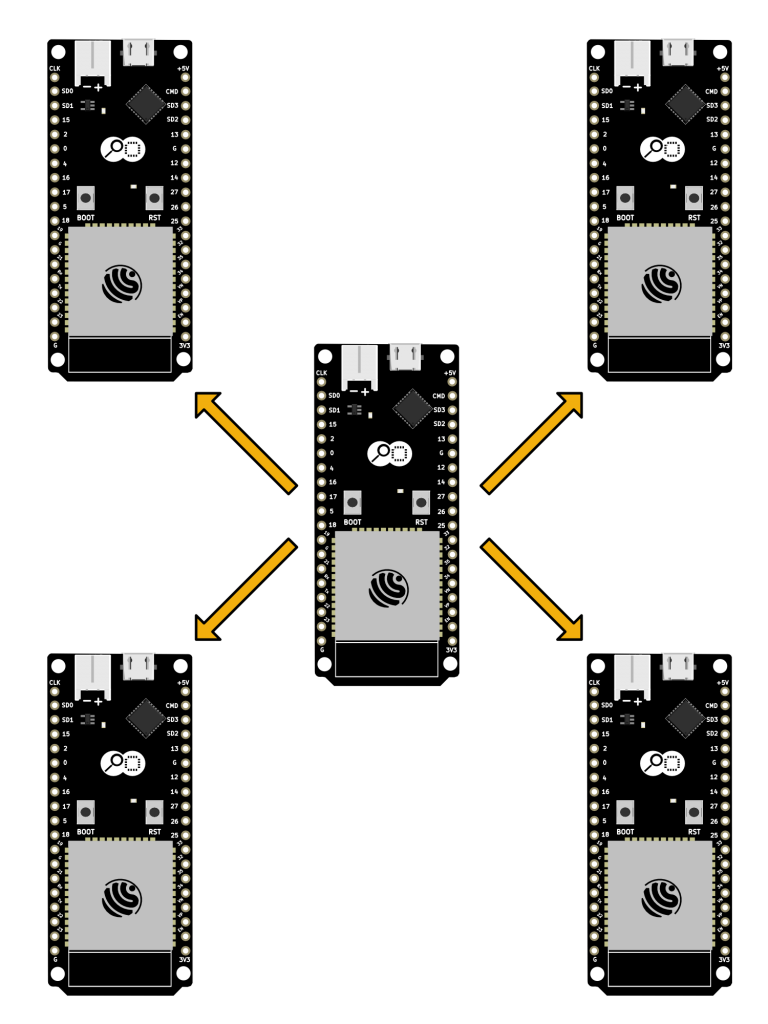
One-to-Many, One-Way scenario is useful for situations where multiple recipients need to be made aware of one or more remote sensor readings, but do not need to send any data back.
A good example could be controlling multiple distinct lighting units in a house based on an input from a remote control. The central ESP32 would, in this scenario, act as the remote control, and the 4 surrounding ESP32s would each control one or more lights.
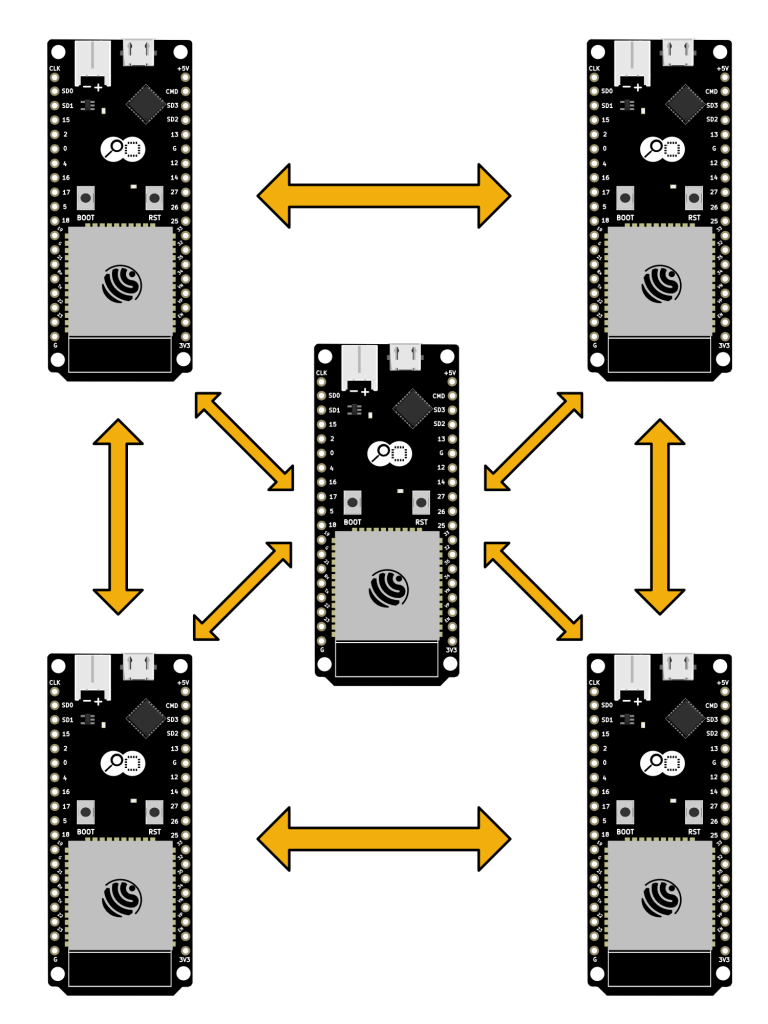
One-to-Many, Many-to-One
Two-Way
One-to-Many, Many-to-One (Two-Way) scenario is useful for situations where the one ESP32 device (the central ESP32 device in the above diagram) interacts with multiple devices, which likewise interact with the central ESP32… but where each device does not need to know of the any of the others.
This is the scenario best suited to the project I was developing that led me down this road of discovery.
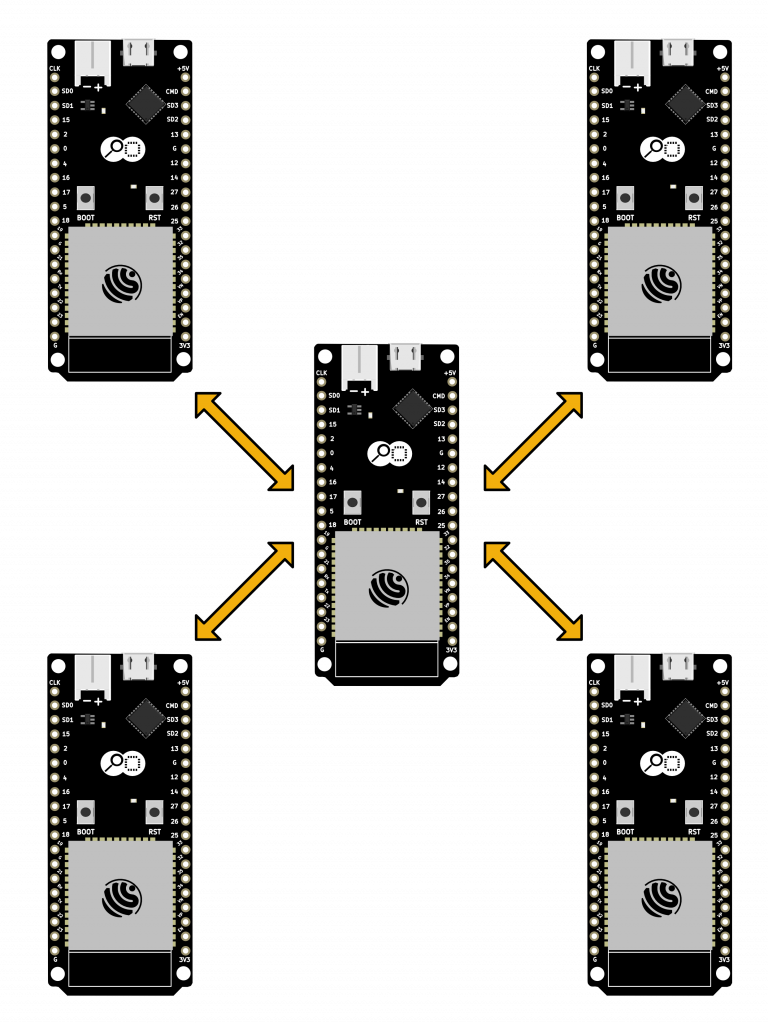
Many-to-Many
One-Way
Many-to-Many, One-Way scenario, while looking fairly chaotic in the above diagram, is surprisingly commonplace in real-world systems.
Let’s presume that the top-left ESP32 provides some processed sensor datum, which facilitates some further process on both the central and top-right ESP32s.
These then produce further processed datum to be used by others, and so forth.
In this scenario, we send data only to the devices that need it.
Many-to-Many
Two-Way
Many-to-Many, Two-Way scenario, just like the previous one, looks fairly chaotic when illustrated in a diagram, yet is also surprisingly common.
Ultimately, Two-Way communication is useful either where the behaviour of one ESP32 is dependent on data from another, or conditional based on the acknowledgement of the other.
In other words, we may want to send data from one device to another, and the behaviour of that first device may be altered by an acknowledgement message from the other.
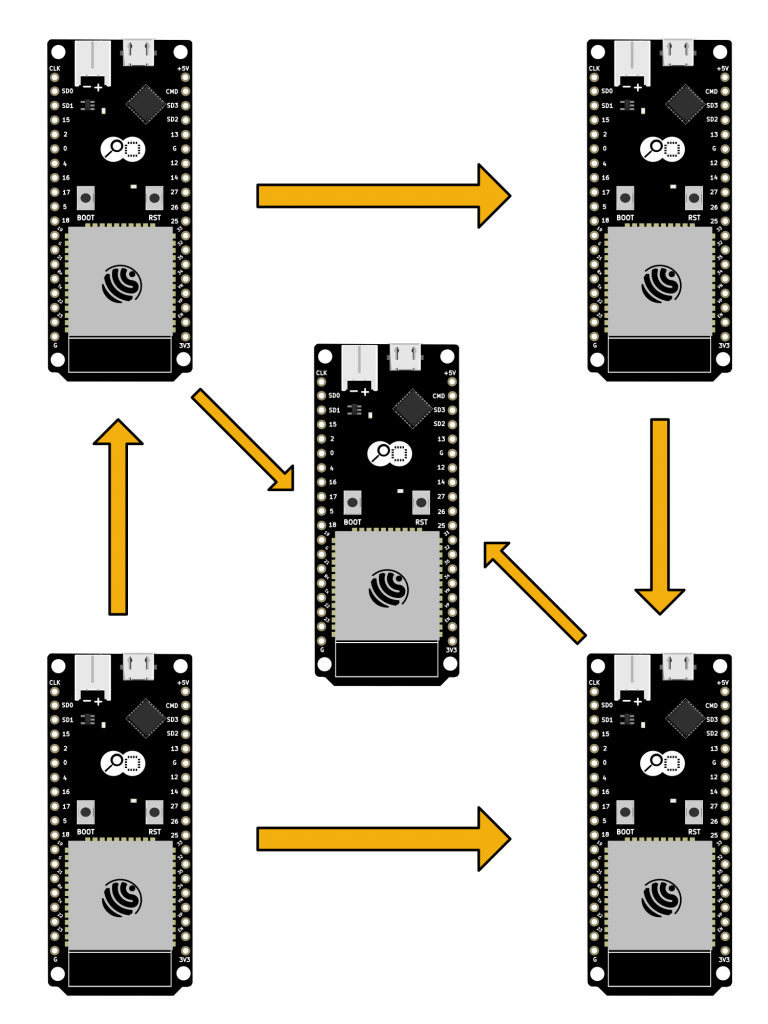
Combination (One- and Two-Way)
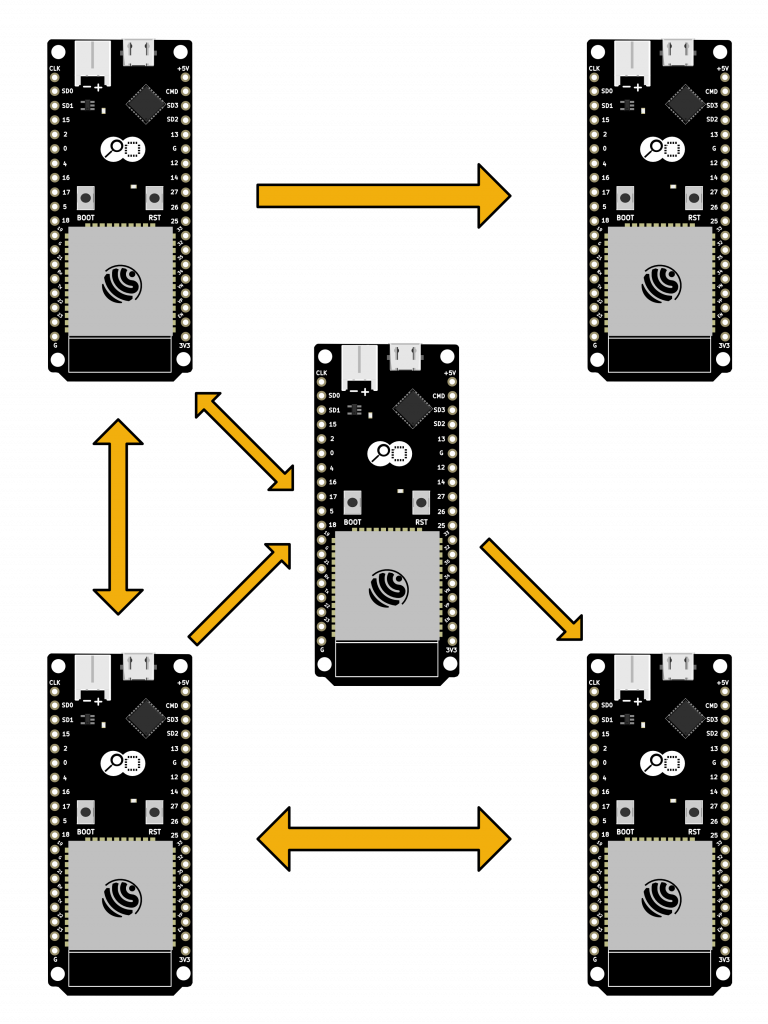
The above diagram illustrates a combination scenario: where some ESP32s communicate One-Way with others, while others communicate Two-Way, and some have no direct communication at all.
If you think about an IoT network of sensors and devices, and were to produce a diagram of their overall communication scenarios, combination is almost certainly what you would be illustrating.
The scenario you choose will depend entirely on your requirements. This series shall focus on facilitating One-To-Many, Many-to-One communications, as this is the behaviour required by the project that led me to discovering the approach documented here.
ESP-Now – Static Pairing
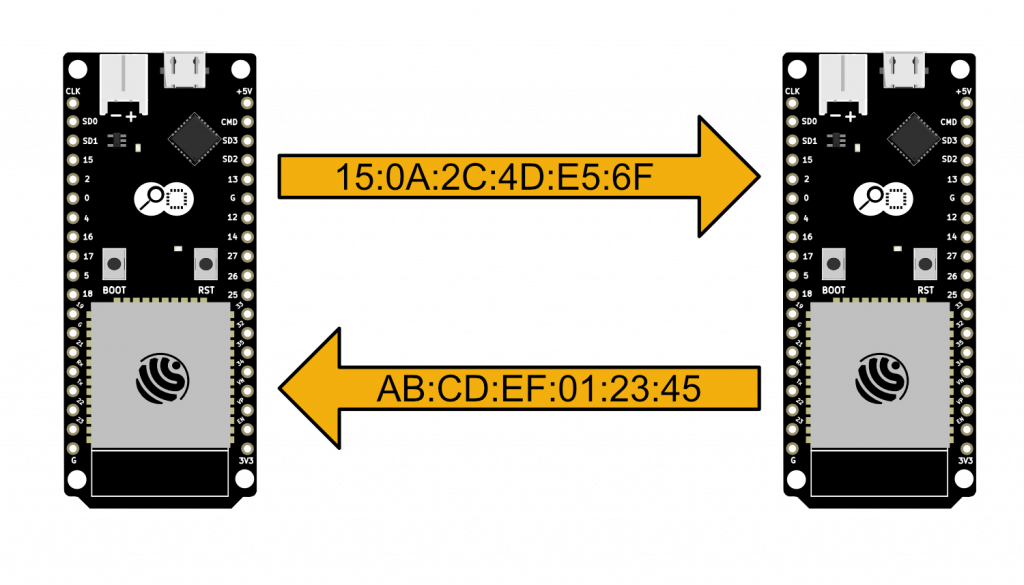
Every article I have read on the subject of ESP-Now has relied on hard-coding the specific MAC addresses of each ESP32’s WiFi radio into the program being flashed onto them. This is because ESP-Now uses the MAC address to initiate communication between devices.
If the scope of your project allows for this (e.g. a small personal project, like your own weather station communicating with multiple distant sensors attached to their own ESP32 MCUs) then you can certainly spare yourself the complexities explored in this series of articles and simply use Static Pairing for your project.
However, even if your project is of a small scale, and entirely within the realms of your control, you should certainly be aware of the pros and cons of Static Pairing.
Pros
- Very simple to achieve in code
- Easy to debug
- Quicker to get up and running
Cons
- If you have to replace one MCU, all associated ESP32s will need to be re-flashed with code containing the new MAC address(es)
Like all things, there are advantages and disadvantages.
It is important that you decide for yourself and for your project(s) whether Static Pairing is appropriate. I suggest you complete this series of articles to make an informed decision.
ESP-Now – Dynamic Pairing
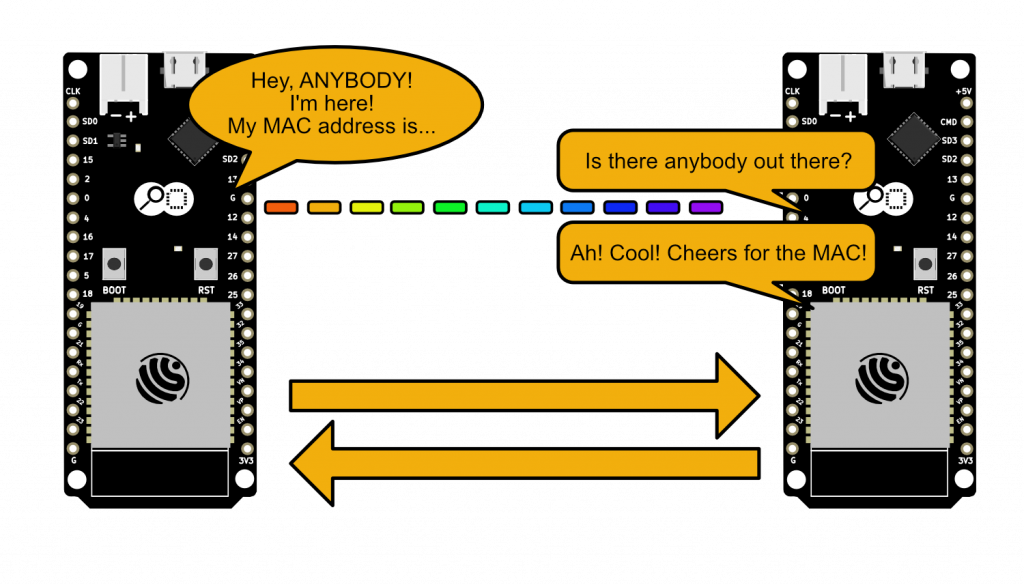
So, where Static Pairing involves hard-coding the MAC addresses of each ESP32 MCU into the programs being flashed onto those MCUs; Dynamic Pairing eliminates the need to pre-define these addresses entirely… at the cost of considerably greater complexity.
Ultimately, in order to facilitate Dynamic Pairing between ESP32s intending to communicate using ESP-Now, we need to provide a means for each ESP32 to be discoverable by other ESP32s, and – through that process of discovery – exchange MAC addresses with each other.
Once each ESP32 has the MAC address of the other, they can perform pairing for ESP-Now, then begin exchanging information.
As we did before with Static Pairing, let’s take a quick look at the pros and cons of Dynamic Pairing.
Pros
- The only real way to provide a fully-dynamic, multi-node solution.
- If an MCU needs to be replaced, no associated MCUs need to be re-flashed or even taken offline.
- Lower long-term maintenance effort required.
- (Almost) limitless expandability.
- Multiple approaches available to make it possible.
Cons
- A lot more code needed to get this working
- More difficult to debug
- Depending on the approach you choose, can significantly increase the size of your program being flashed (may even need to adjust the partition sizes)
As you can see, there is a lot more to consider with Dynamic Pairing in terms of both pros and cons. Again, I recommend completing this series of articles to make an informed decision for your own project(s).
Discovery, the many roads thereto
Automatic discovery is far from a new concept. Ever bought an Apple product, switched it on, and been astounded when your phone/tablet instantly becomes aware of your shiny new toy, ready and waiting to be configured? This is automatic discovery, and when it comes to the all-important User Experience… it reigns supreme.
Different use-cases will utilise different approaches to facilitate automatic discovery.
For instance, the camera app on your smartphone uses QR codes to automate the discovery process. QR codes are extremely versatile, in that they can provide more than one context for discovery; such as a website address, or secure credentials for connecting to a WiFi network without having to enter a single character of a password. Heck, in this post-COVID world, QR codes are providing a rapid means for border authorities to validate PCR test and vaccination certificates.
Let’s briefly take a look at just some of the possible approaches to facilitate automatic discovery. Why? Because, as with all things, they each have their own pros and cons.
QR Codes

As we mentioned before, QR codes provide a means of automating the discovery process.
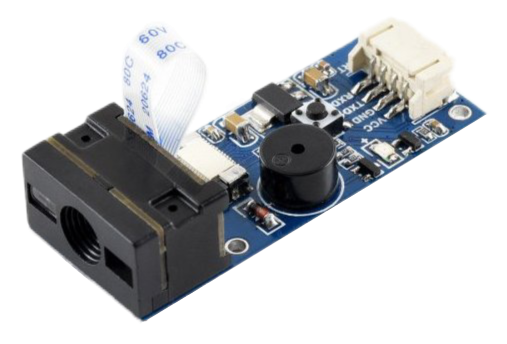
QR codes use an optical scanner (such as a camera) to read digital information from a physical image. This digital information can be literally anything… even the MAC address of an ESP32’s WiFi radio!
It should be noted, however, that, in order to use QR codes to automate discovery for ESP-Now, you would need to attach an optical scanner device to at least one ESP32, and a suitable display module to present a QR code on the other(s). Depending on the purpose of your devices, this may be highly impractical. However… it is absolutely possible, and would certainly work.
Remember: all ESP-Now requires in order to initiate pairing is the MAC address of the remote ESP32s’ WiFi radio. A QR code can easily provide this data.
NFC
Near-Field Communication (NFC) is, in essence, an extremely short-range transmission between two devices, which carries a small amount of data.
How small an amount of data? Well, this depends on the “tag,” but typically between 48 bytes and 8 kilobytes.
Even 48 bytes is massively more than necessary to transmit a MAC address (which is just 6 bytes).
NFC tags are used extensively to automate the discovery process, again across a broad range of contexts.
Most people associate NFC with door entry/security systems, however this is only one application of a great many.
NFC is used by DSLR cameras to automate discovery for smartphone apps, is used in “smart business cards” to direct a smartphone to go to a specific web page or social media account, and even as “trigger beacons” to automate processes on people’s phones.
Now, let’s get to the downside of NFC.
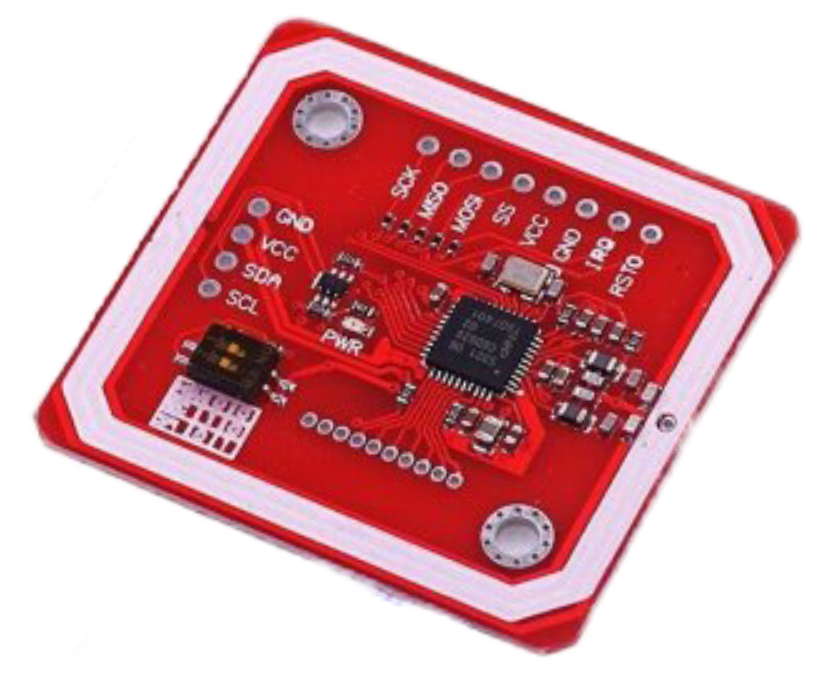
Just as you would require additional hardware on your devices to provide and consume QR codes, you would likewise require additional hardware to provide and consume NFC.
You would need to embed an NFC writer (or a pre-coded NFC tag) into at least one of your ESP32 devices, and an NFC reader into the other(s). This increases cost and complexity, so while it is entirely viable to use NFC to automate discovery, it might not be the most practical solution for your project(s).
Over-The-Air Low-Frequency Radio Broadcast
I mentioned previously in this article about the use of external radio modules to achieve communications between Arduino modules. Well, an external radio module can also be used to facilitate automatic discovery between ESP32 modules.
You can, for example, attach an HC-12 433MHz radio transceiver module (which are both cheap and effective, even at considerable range) and broadcast the MAC address from one ESP32 to be received by one or more ESP32s. Indeed, this was the first approach I used for my own project, before deciding that it is impractical and – in my opinion – ultimately unnecessary with the ESP32.
The downsides? Well, for one you would need to attach a radio transceiver module to each ESP32 device.
Fortunately for the HC-12 (specifically) this only requires two pins: an RX and a TX. Also, SoftwareSerial can be used if hardware UART pins aren’t available on your devices.
Beyond the need for additional hardware, there is the potential for considerable interference, especially with 433MHz transceiver modules.
Indeed, I have genuinely had my devices pick up data from the FOBs people use to lock and unlock their cars. I have had to write “signatures” into my data packets to be able to quickly identify them as “relevant.” However, this should be considered “best practice” for all wireless transmission solutions, as you can never truly guarantee that the data you receive was produced by your intended source.
To summarise, the use of an external radio module (be it 433MHz, or 2.4GHz such as the nRF24L01) is an entirely valid way to automate discovery.
Ultimately, however, it is entirely unnecessary with the ESP32… as (to repeat what I said at the very beginning of this article) the ESP32 provides all of the radios we require to automate discovery.
To conclude Part One…
… we have looked at:
- A brief introduction to ESP-Now as a means of communicating between ESP32 devices
- The communication scenarios ESP-Now provides
- Static Pairing as a concept, as well as the pros and cons
- Dynamic Pairing as a concept, as well as the pros and cons
- Automatic Discovery as a concept
- Real-world examples of Automatic Discovery
- Multiple means of automating discovery, as well as their pros and cons
In Part Two…
… we shall dive into the best solution for automatic discovery between ESP32 devices, without the need for any additional hardware components.
The next article will focus heavily on actual implementation, rather than preface and conceptual information.
Thank you for reading!
I want to finish by thanking you for taking the time to read this article. I hope you have found the information herein useful.
Should you have any feedback or questions, you are more than welcome to leave a comment on this article, and responses will be given (where appropriate) at the earliest opportunity.

[…] ESP-Now [Pin-Depth] with Automatic Discovery & Pairing (Part One) […]
Hello, Very Good article, however, the complete solution would be not to use Bluetooth as the ESP8266 doesnt has it.
I agree that the ESP8266 will require a different approach to Automatic Discovery, however, these articles are specifically for the ESP32.
I will at some point in the not-too-distant future go through other approaches for Automatic Discovery, virtually all of which will work on the ESP8266 👍🏼
Very solid and we written article.
My solution to the discovery problem is to have the slaves (the nodes not in WIFI_STA modus) do a broadcast on all channels, there are only 13, maybe 14 to iterate. The master will respond with a messages which includes its channel. From there on the slaves can address the master directly. It comes with some additional difficulties like when the master is switched to another channel by the AP, the nodes need to go back into discovery when this happens. But this way i can leave the entire BLE stack out of my image.
This is an interesting approach. I do wonder, though… let’s say you have 2 slaves connected already, and then you need to pair a third.
If you put the master into “pairing” mode, will this prevent communication between the master and the 2 existing slaves until pairing mode concludes?
Excellent tutorial, well written and contains enough information so that even a dummy like me can follow along. Thank you very much for taking the time to create these articles and for making the available.
I did as you suggested and typed the code myself rather than copy & paste (well, almost all – I did copy some of the BLE code), but keep getting an error from
enum ButtonState {
ButtonDown, // The button is being pressed/held
ButtonUp // The button has been released
};
ButtonState buttonState;
inline ButtonState getButtonState() {
return digitalRead(PIN_BUTTON) == HIGH ? ButtonDown : ButtonUp;
}
exit status 1
‘ButtonState’ does not name a type
What am I missing? And is the next episode coming soon?
Thanks again.
May I ask, where are you defining
enum ButtonStatein your code?What I mean is, did you define it in a separate file and forget to add the
#includein the consuming code file?Yes, the next part will be coming early in January. I have been considerably delayed due to a combination of work commitments, and – frustratingly – almost 3 weeks spent recovering from COVID.
Hi Simon,
I completely forgot about this, it appears that I haven’t received an email to notify me of your reply. Sorry to hear about your COVID misfortunes and I hope you were not too inconvenienced and fully recovered.
Having just checked your GitHub repository, I can’t help but notice that the las update was 8 months ago. Does this mean that the project is still on hold?
My apologies if I sound like a teacher nagging you for your homework 🙂
Regards