No Keyboard? No Mouse? No Monitor? No Problem!
When you’re setting up a Raspberry Pi, don’t you find it rather awkward having to make a monitor, keyboard, and possibly also a mouse available just for the sake of setting it up to run a service or process that doesn’t need these peripherals?
Well, in this guide, we’re going to set up a Raspberry Pi using a PC or laptop – headless!
What is Headless?
When someone refers to a computer as “headless,” they simply mean that it has no screen connected. As there’s no screen connected, there’s no reason to connect a keyboard or mouse, either.
Headless systems are more common than you might realise. Sensor units, weather stations, basically all Smart Home devices… all examples of Headless systems.
When it comes to the Raspberry Pi, it is quite normal to want to have one running at all times without a dedicated display, keyboard, or mouse. We remote into these systems to do whatever it is we need to do.
Indeed, I have a few Raspberry Pi 4 computers running, headless, 24/7, and use them for a range of purposes… including one that is used solely as an on-device Development Platform for writing and instantly debugging/testing Raspberry Pi software.
Whatever the need, the ability to fully configure a Raspberry Pi without any monitor, keyboard, or mouse, is extremely useful. Even if you don’t want to do this right now; knowing how may be invaluable to you later.
What you need
To follow this guide, you will need some fundamental items.
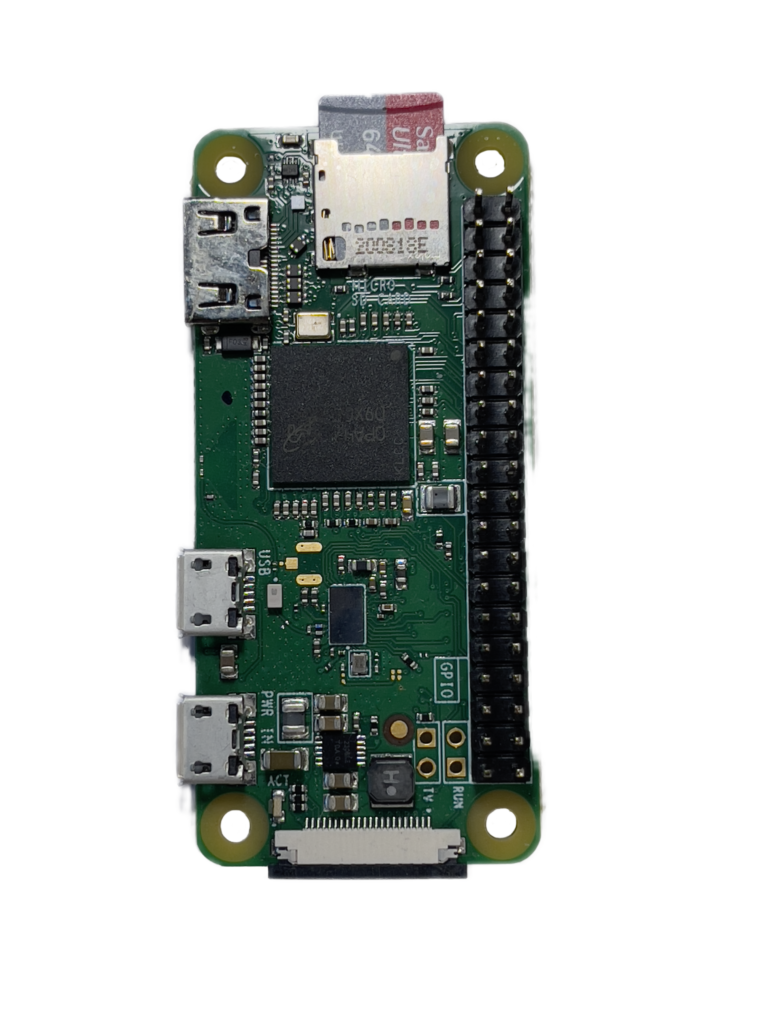
A Raspberry Pi.
It doesn’t matter what type or model, so long as it either has WiFi (embedded or USB dongle) or an Ethernet port to which you connect a cable for your Network.
A PC or Laptop.
Windows, Mac, Linux… or even another Raspberry Pi set up headed for use by you. So long as you can interact with it, it’ll do the job.

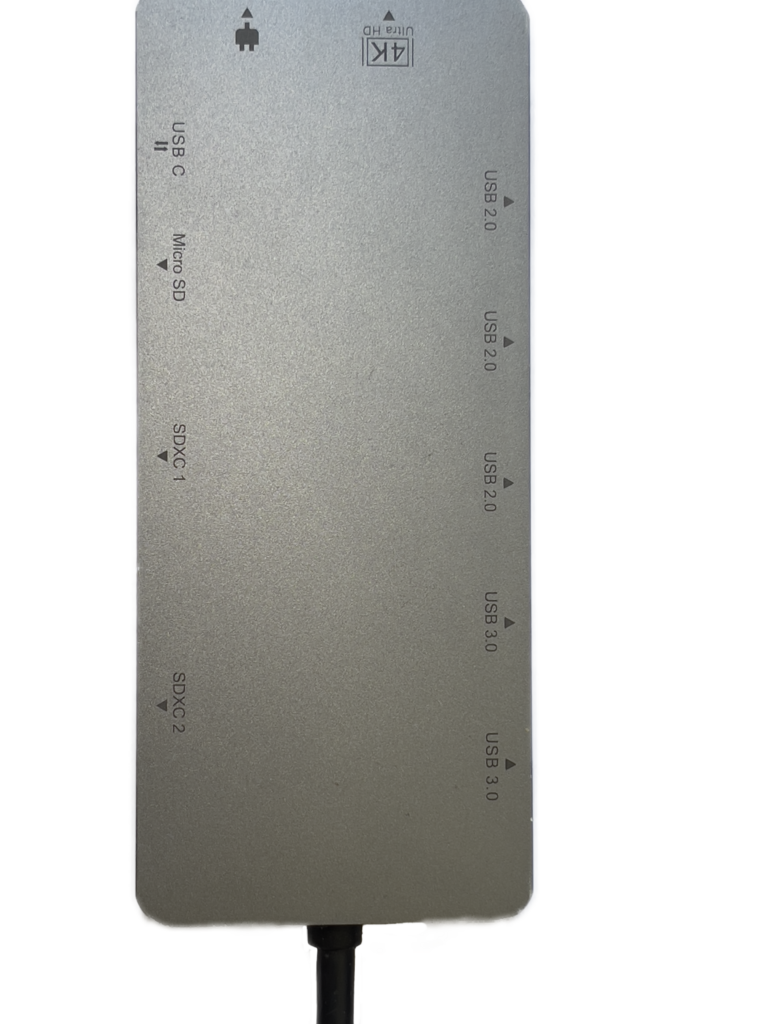
An SD Card Reader cable of connecting with your MicroSD Card.
You can use a full-sized SD card slot with a MicroSD Card Adapter… this works just fine.
A means of connecting to a remote machine via SSH.
This is built-in on MacOS and Linux, but you may want to download PuTTY on Windows.
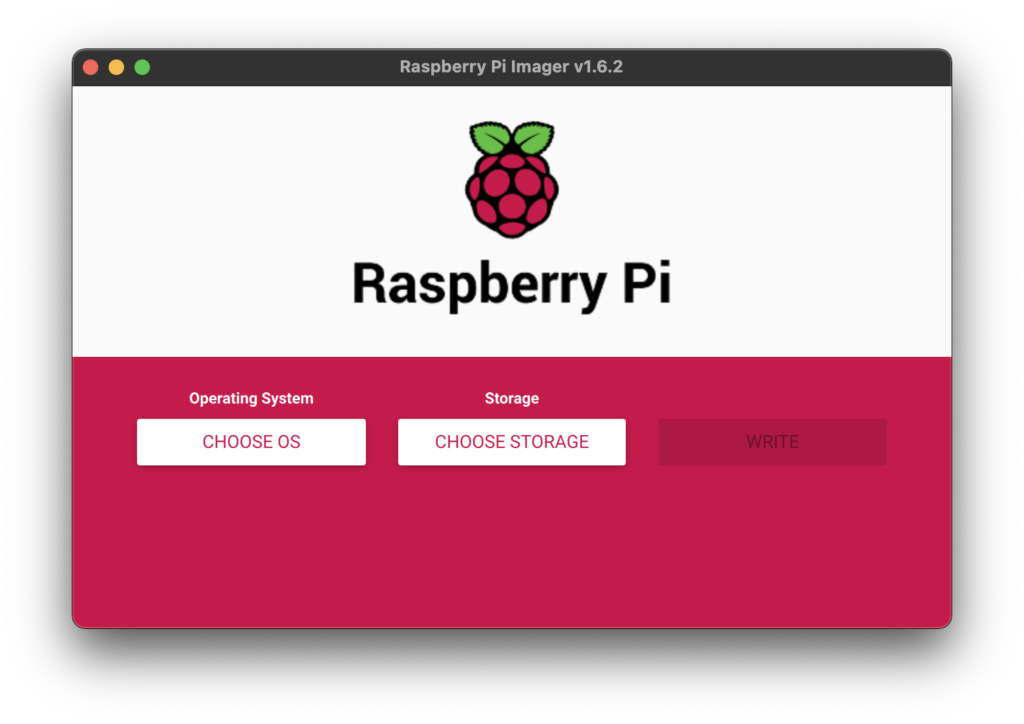


Raspberry Pi Imager – from the official Raspberry Pi website.
This is the tool we use to flash Raspbian (the official Raspberry Pi Operating System) to our MicroSD card.
The tool is available for Windows, MacOS, and Linux.
You only need this for NEW installations!
A suitable MicroSD card.
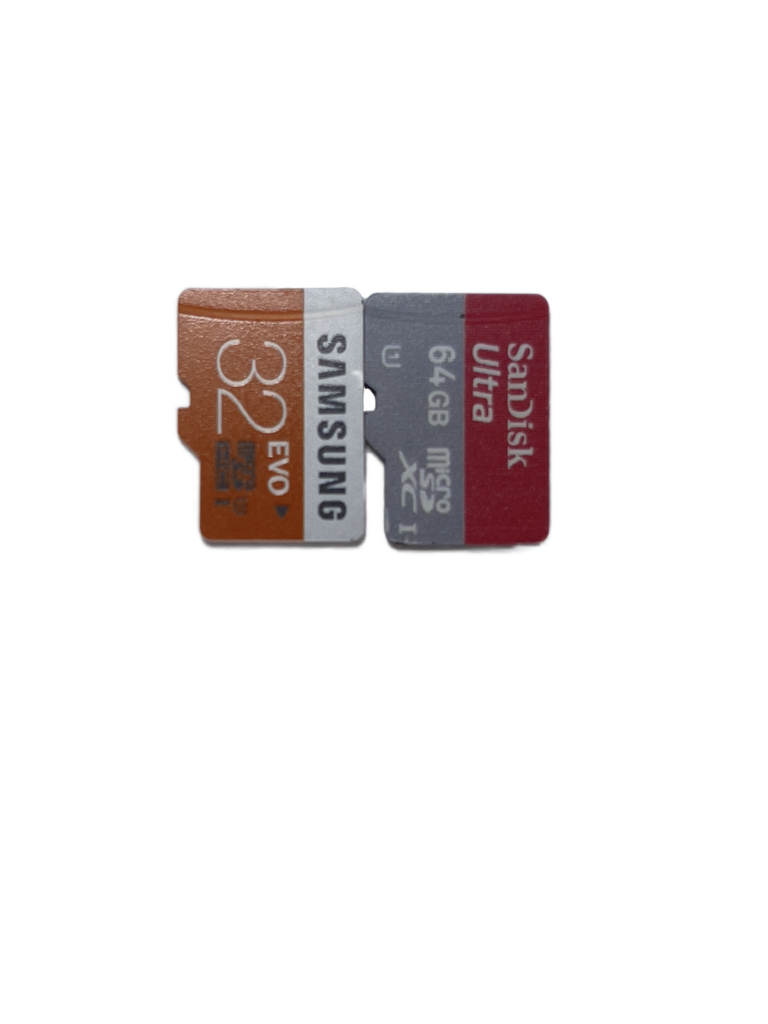
Anything over 4GB should be sufficient, but check on the Rapsberry Pi website because Raspbian is evolving. Personally, given the cost, I don’t bother buying any SD card smaller than 32GB.
This isn’t a paid endorsement, but I’ve had the best reliability from official SanDisk MicroSDXC cards purchased from an approved retailer only.
Beware of fake SD cards! They’re everywhere, sadly, and difficult to spot if you don’t have extensive experience. If it’s too good a price to be true, it probably is a fake!

Let’s Get Started!
Now that you have gathered the required items and tools, we’re ready to get started.
This guide is going to progress sequentially, as a completely fresh Raspberry Pi setup for the Raspberry Pi Zero WH. It will work just the same on any other model of Raspberry Pi.
Installing Raspberry Pi OS onto a New SD Card, with full Headless Remote Access and WiFi!
If you already have Raspbian installed onto a MicroSD card, and just want to set it up for remote access, you can skip this entire section.
We shall start by installing Raspbian (the Raspberry Pi Operating System) onto an SD Card.
We also need to connect our SD Card Reader, and insert our MicroSD card.
With these steps completed, we launch the Raspberry Pi Imager tool.


Please note that, while I’m taking my screenshots on MacOS, the screens will look largely the same on Windows and Linux.
Then, we press CHOOSE OS.
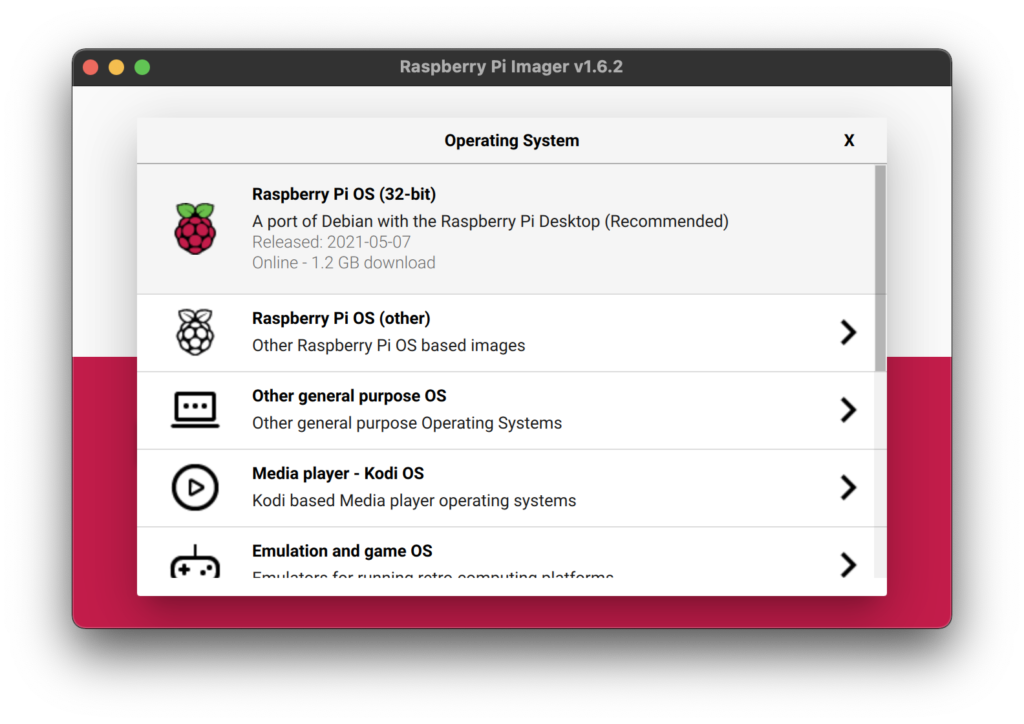

By default, the Raspberry Pi Imager will select the complete Raspbian Desktop distribution.
If you’re looking to set up a light-weight Desktop Environment on your Raspberry Pi, this would be a good choice for getting started, as it includes a GUI Shell already, with all the basics ready to go for you “out of the box.”
If you’re new to Raspberry Pi, this is likely the best choice for you.
If you want the default OS, then you can select this option and skip the custom OS selection explained below.
However, if you’re setting up a Raspberry Pi for a more custom purpose, or want to use a different GUI Shell, or don’t want any GUI Shell at all… we need to select Raspberry Pi OS (other).
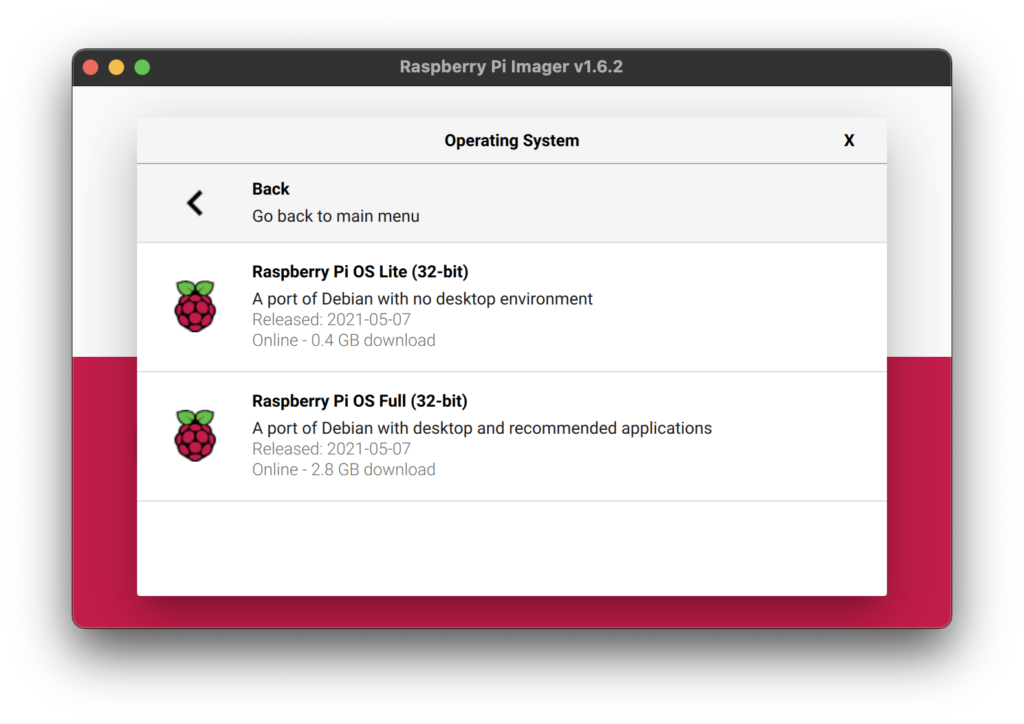

If we’re making a custom selection, we are presented with two options.
Raspberry Pi OS Lite (32-bit) is a stripped-down, light-weight version of Raspbian with the bare minimum components installed.
This is the ideal choice for either non-GUI use-cases (such as networked sensors or integrated systems applications) and also for fully-custom setups (where you want to select your own applications and Shell, all to suit you).
Raspberry Pi OS Full (32-bit) is Raspbian with all the trimmings. It contains a lot of applications you would use if the Raspberry Pi was your primary PC. If that’s what you’re going for, or you just want to play around and see what Raspbian contains, then you may want to select this option.
For my purposes, I’m choosing Raspberry Pi OS Lite (32-bit), as my intended usage for this particular Raspberry Pi Zero WH unit does not require any GUI Shell, and I want to install very specific software.
No matter which version of the Raspberry Pi OS you choose, we are ready to continue with the next step.
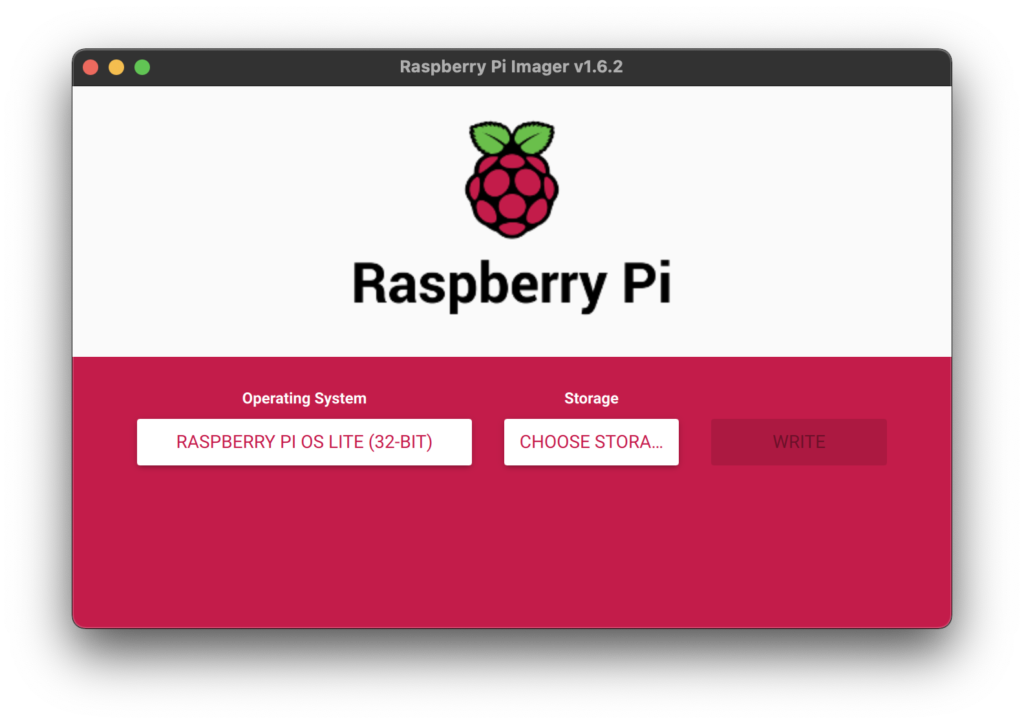

We are now ready to press CHOOSE STORAGE.
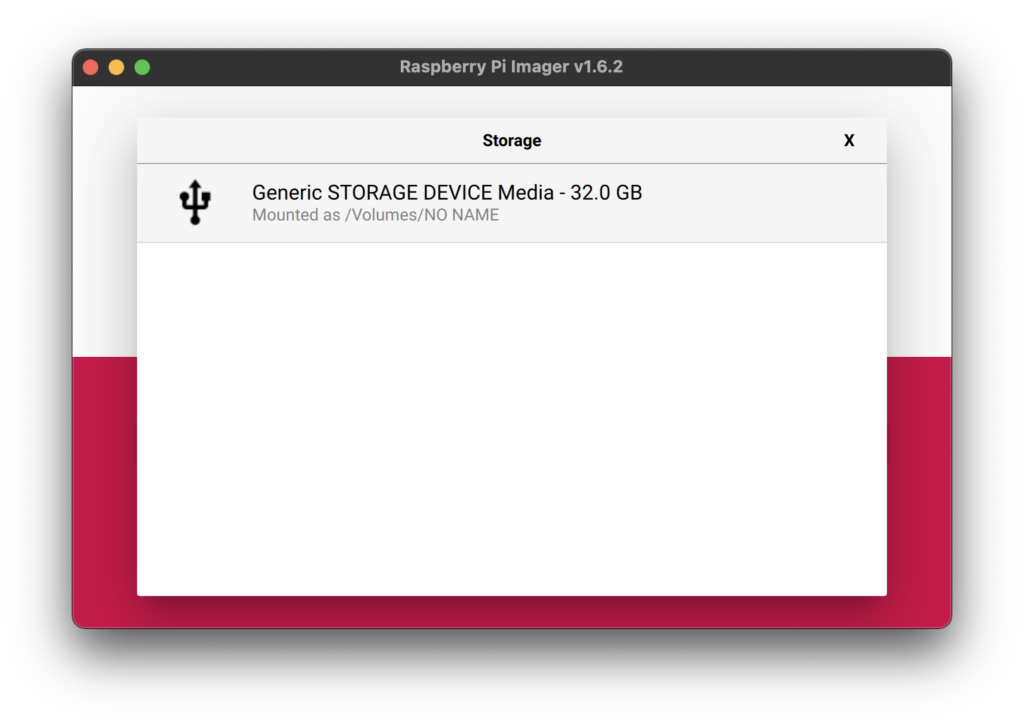

Here, you will see a list of all “USB Mass Storage Devices” (e.g. USB Flash Drives and SD Cards)
In my case, I have my 32GB MicroSD card that I am using for this Raspberry Pi Zero WH.
Be aware that the device you select will be fully-reformatted as part of this process. All data on the device you choose will be lost, so be absolutely certain that you select the correct SD Card!
Simply click on the correct Storage Device to select it.
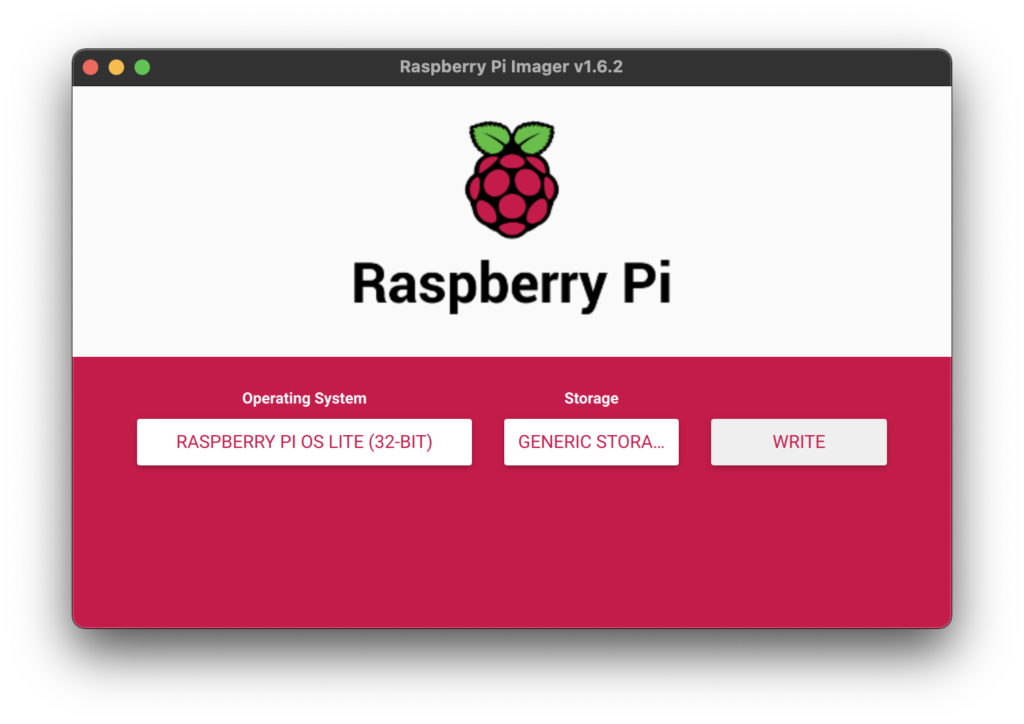


With our Storage Device selected, the WRITE button becomes available.
However, there’s one more thing this Raspberry Pi Imager tool enables us to do (a secret feature) that will save us some time!
On Windows or Linux, press Ctrl + Shift + X .
On MacOS, press Command + Shift + X .
You may be prompted for Elevated Privileges on your OS. If so, it’s safe to provide Affirmative Consent.
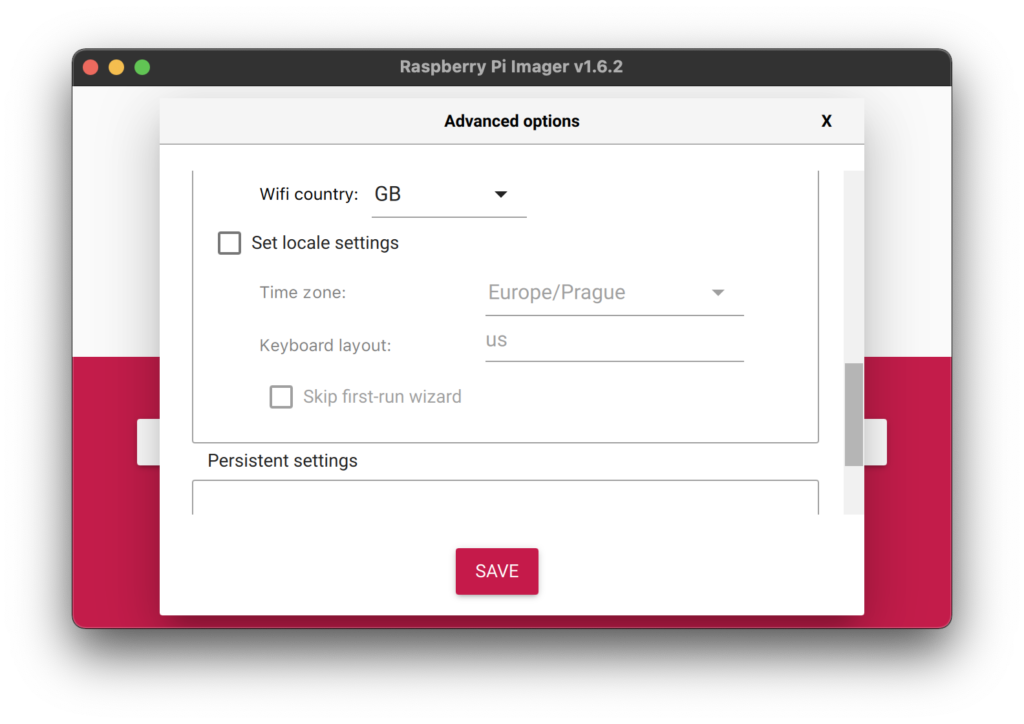

This secret Advanced Settings Screen enables us to pre-configure Raspbian automatically, meaning that we only need to complete this section of the guide.
Scroll to the top of that Advanced Settings Screen, and let’s take a look at the options we need to care about.
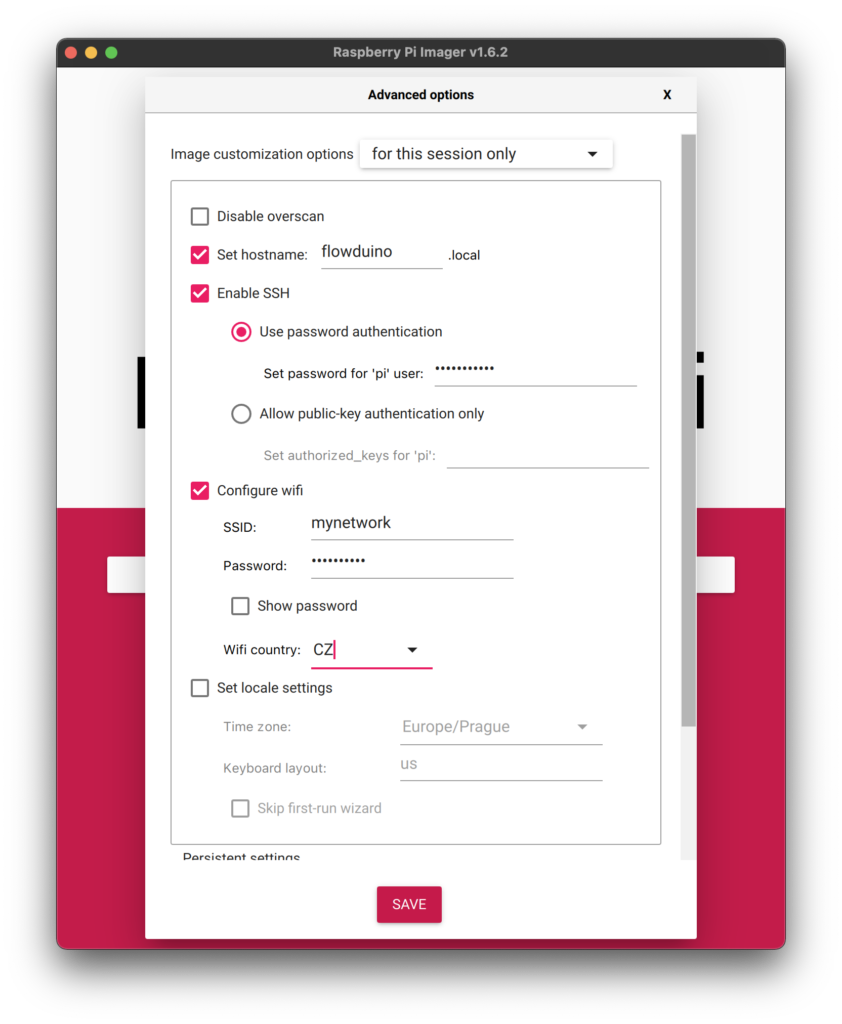

Set hostname enables us to define a custom name for our Raspberry Pi. By default, it will be set to raspberrypi.local. This name matters, because we can use this Hostname to connect to our Raspberry Pi over SSH.
Enable SSH is essential. This enables us to remote control our Raspberry Pi, which is fundamental for a Headless setup.
SSH – Use password authentication is important. By default, the Password for the user named “pi” is “raspberry”, and this would not be a very secure password to use. Ideally, configure a custom password here… it’ll save you time later!
Configure WiFi if your Raspberry Pi has WiFi, and if you aren’t using Ethernet. You can pre-configure your WiFi settings at this point.
Interesting note: on MacOS, the SSID and Password were pre-filled by the Operating System. I am unsure if this would happen on Windows.
WiFi Country is a legal requirement. You should set this to your exact Country Code. This is because different Countries have different lawful channels (frequencies) for WiFi operation. Using any device on frequencies outside of this range without a license could be a civil or even criminal offence.
You may also configure your Locale settings as you see fit.
Once you have configured these settings, press SAVE to return to the main screen.


Press WRITE
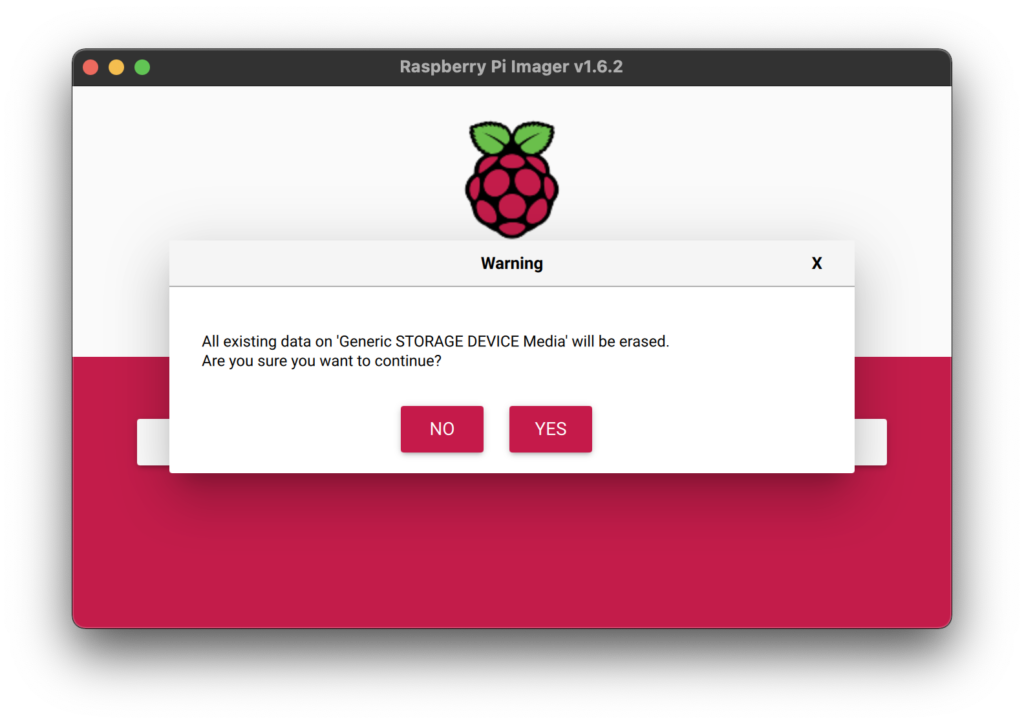

We are presented with our final opportunity to confirm that we have chosen the correct Storage Device.
Once you are certain, press YES.
You may be presented with an Operating System confirmation/approval screen such as the following on MacOS
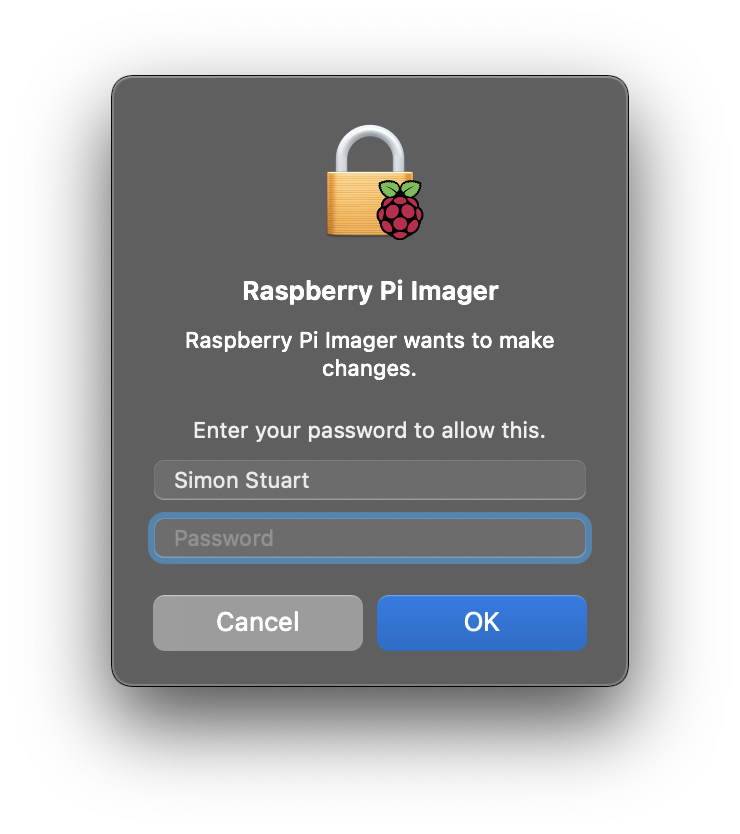

On Windows, you may see the User Account Control (UAC) Confirmation Dialog.
This is because Raspberry Pi Imager is about to reformat a mounted Volume (the MicroSD card). Your Operating System is attempting to protect you, because – imagine – if this were a piece of malicious software, you wouldn’t want it to be able to erase all of your storage devices without your knowledge.
In this instance, we need the Raspberry Pi Imager to reformat our SD card, so enter your password and provide Affirmative Consent to continue.
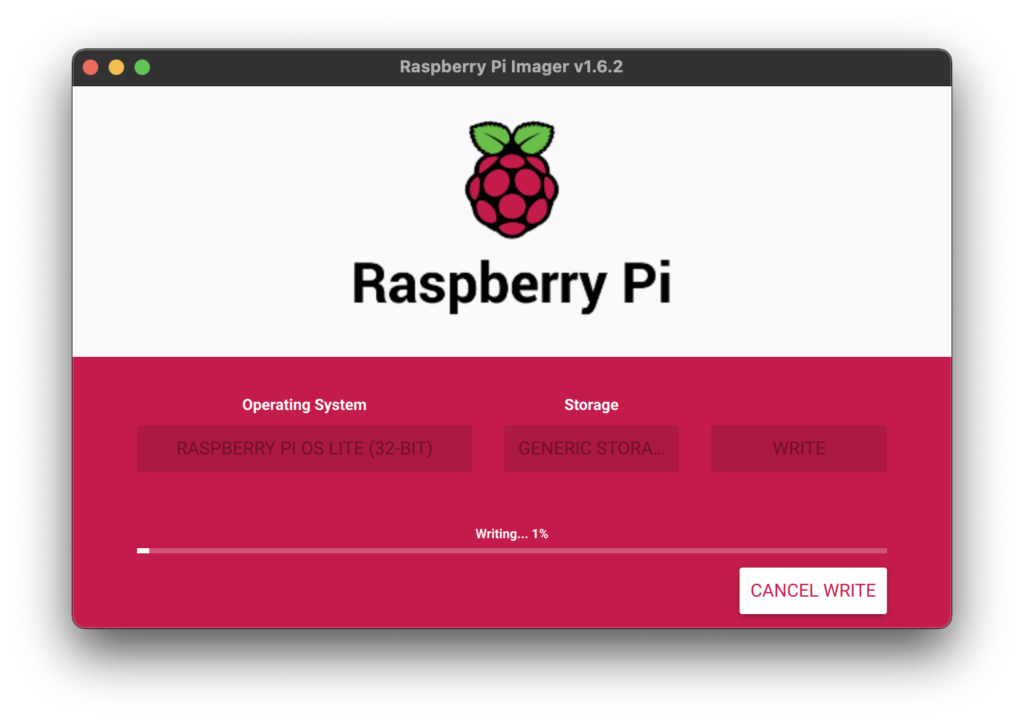

Raspberry Pi Imager will now begin reformatting your SD Card and deploying its Raspberry Pi OS partitions and files onto it.
This process can take some time, because the OS files are being downloaded over the Internet. The OS variant you selected will significant affect the time it takes, as well – of course – as the speed of your Internet connection.
Go make a tea (I’m British) or coffee if you prefer.
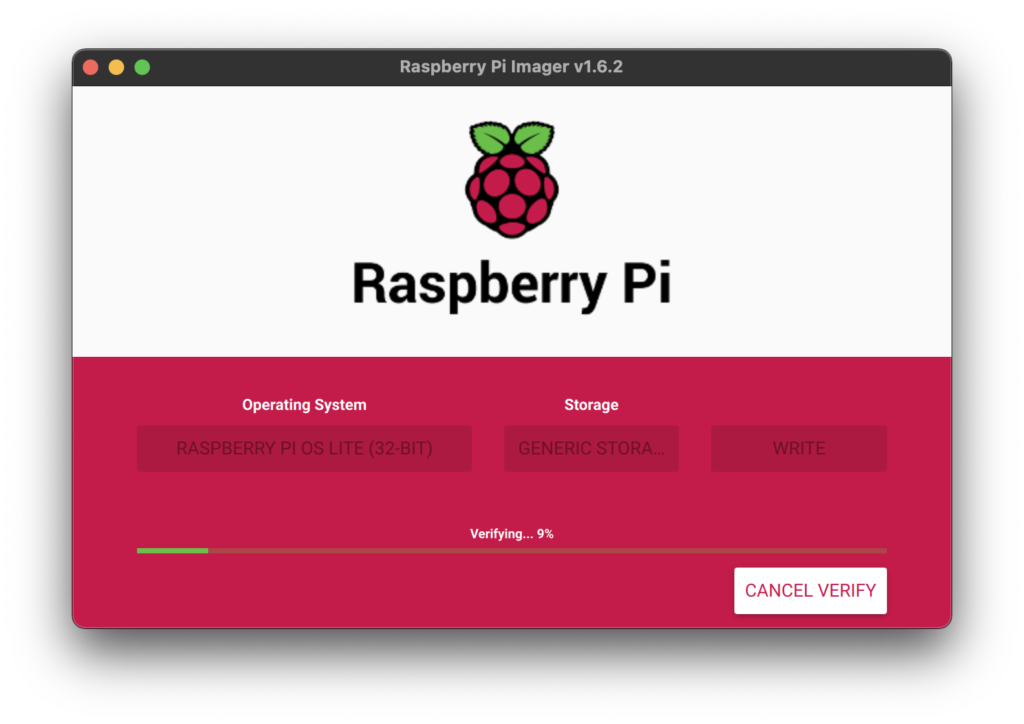

Once the Writing portion has completed, Verification begins. This process takes a lot less time to complete.
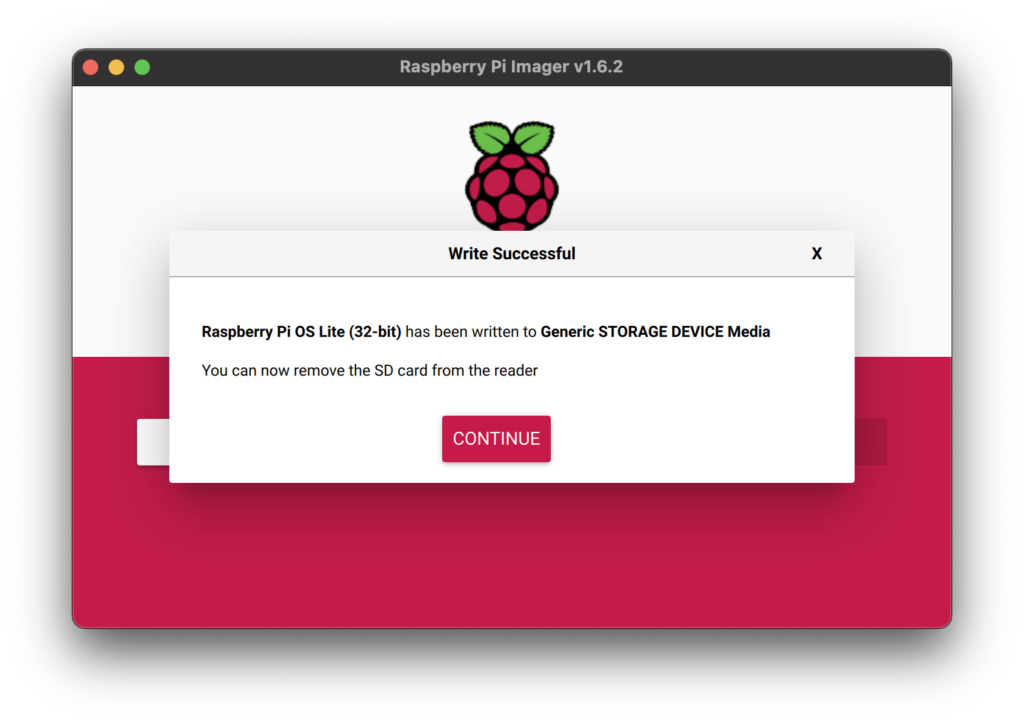

Congratulations! Raspbian has just been installed onto your MicroSD card, and is ready for remote access (via Ethernet or WiFi, as applicable).
You can now close the Raspberry Pi Imager Tool.
You can now insert your MicroSD card into your Raspberry Pi, power it on, wait a few moments, then proceed to the section of this article named Remote Controlling a Raspberry Pi using SSH.
Setting up SSH and WiFi for an Existing Raspbian SD Card
If you have an existing Raspbian installation on an SD Card that you need to configure for Remote Access (SSH) and WiFi without using a monitor and keyboard on your Raspberry Pi, we have a solution for you!
Remove your SD Card from the Raspberry Pi and insert it into your SD Card Reader for your PC or Laptop (if you haven’t already done so).
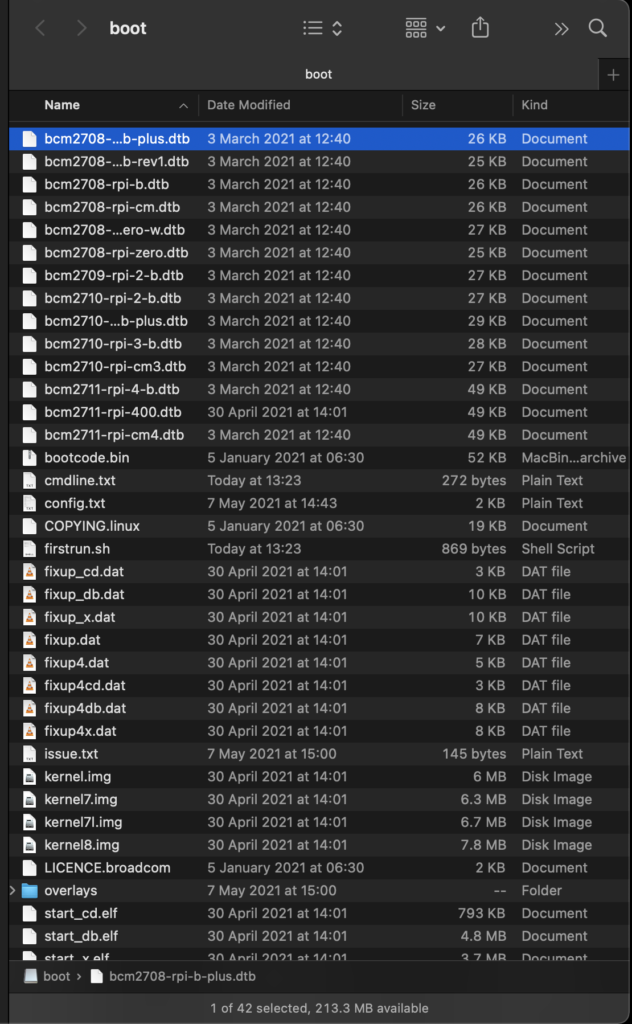
You will see a volume appear in your File Management tool (Explorer on Windows, Finder on Mac, whatever you use on Linux). This volume (by default) will be named boot.
Its contents look like this:

Enabling SSH
This is literally as simple as creating a blank file on boot (in the top-level/root folder) named ssh. It has no extension.
If using Notepad on Windows, you will need to either ensure that you change the File Extension on the Save Dialog from .txt to “Any File,” or that – in Explorer – you enable showing of File Extensions:
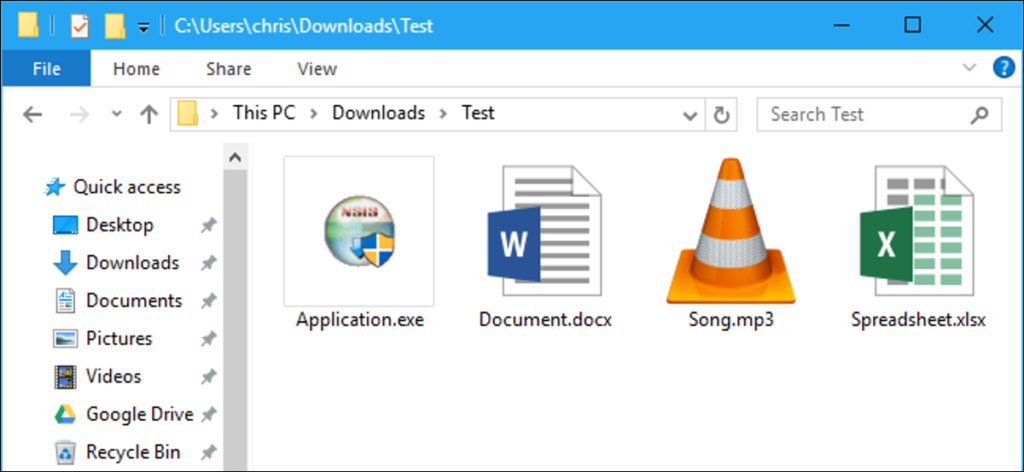

With that enabled, you can remove any file extension by renaming the file in Explorer, and ensuring that you leave only the word ssh.
Configuring WiFi
If you are using the Ethernet port instead of integrated or USB-attached WiFi, you can skip this segment.
This step is a lot like enabling SSH, except it involves a little more effort.
With your MicroSD card connected to your PC or Laptop, we’re going to create a new file on the top-level (root) folder of your SD Card (named boot) with the name wpa_supplicant.conf
As with SSH, you may need to enable the display of File Extensions to change the .txt to .conf.
This file will need the following content:
country=GB
ctrl_interface=DIR=/var/run/wpa_supplicant GROUP=netdev
update_config=1

network={
  ssid="NETWORK-NAME"
  psk="NETWORK-PASSWORD"
}
You will replace NETWORK-NAME with the SSID (broadcast name) of your Router/Access Point.
You will replace NETWORK-PASSWORD with the password of your WiFi Router/Access Point.
Save this file.
It is now time to safely Eject your SD Card, and place it back in the socket on your Raspberry Pi unit.
Power it on, and wait for a few minutes.
Remote Controlling a Raspberry Pi using SSH.
With our SD Card inserted, and power supplied to our Raspberry Pi, we are now ready to remotely connect to it using SSH.
On MacOS or Linux, we can simply bring up a Terminal session, and enter:
ssh pi@<hostname>.local
Where <hostname> is the name you gave during the Raspbian Installation, or (for default/existing installations) raspberrypi.
On Windows, you need to load PuTTY.
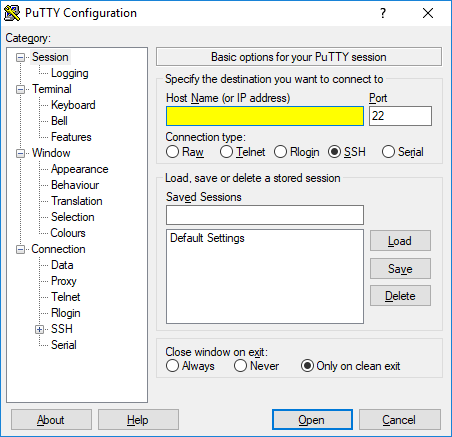

In the above screenshot, inside the yellow-highlighted box labelled “Host Name (or IP address)” you will enter <hostname>.local, again where <hostname> is the name you presented in the Advanced Settings screen when installing Raspbian, or raspberrypi if using defaults.
For PuTTY users, you can press Open.
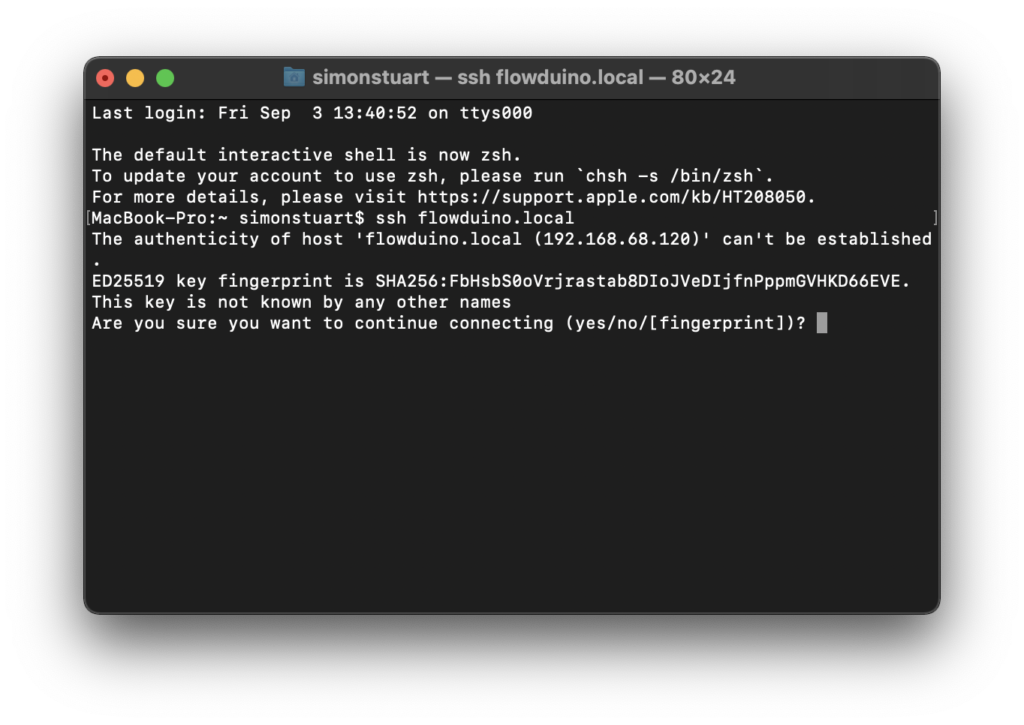
You will be asked to confirm the Fingerprint or Certificate for your device. On MacOS (Terminal) this looks as follows:


I don’t have a screenshot for this process on Windows, but I believe it is similar, only in Dialog format instead of Terminal output.
Regardless of your Operating System, you will need to confirm this Certificate/Fingerprint.
On Windows, you will now enter the username pi and your chosen Password (raspberry by default for existing installations). On MacOS/Linux, you only need to enter the Password.
Congratulations! You now have full Remote Control of your Raspberry Pi, headless, without the need for any peripheral devices connected to it.
Progressing from Here
From here, we can install and configure every aspect of our Raspberry Pi, including (where useful) a GUI Shell of your choosing.
I won’t be covering these in this article, for the sake of keeping things concise and on-topic. However, if there is something specific you would like to know how to do, don’t hesitate to ask.
Reader requests is a great way of focusing on topics that are directly relevant to, and useful for, the community.


Thanks for the nicely written article. Excellent. Wish I had found this when we first bought an RPi. Any suggestions on a headless, off-network approach to running an RPi. I have prototyped an RPi to detect squirrels but rely on a mac laptop and wi-fi network to run TensorFlow Lite and then to shut down safely. I am aiming to eliminate the laptop and wi-fi dependency. The first task to figure out is to run my modified TensorFlow Lite script automatically when I plug in the RPi. Pretty sure I tried https://www.tomshardware.com/how-to/run-script-at-boot-raspberry-pi, without success. Second, is to shut it down safely without a connection, maybe using the headless paperclip shutdown at https://www.recantha.co.uk/blog/?p=13999. Any thoughts are much appreciated. Best, Chris.
For service autostart, you can use the following instructions: https://roboticsbackend.com/make-a-raspberry-pi-3-program-start-on-boot/#Add_a_systemd_service
This is what I do with mine… easily configured via SSH terminal.
Shutting down the RPi when there’s no signal, your script would need to invoke shutdown command as a CRON, but it needs to be executed with sudo.
Thank you kindly Simon Stuart for your very helpful reply.
Have a good one. Cheers.